Exercise: Sensor Driven Servo

Objective

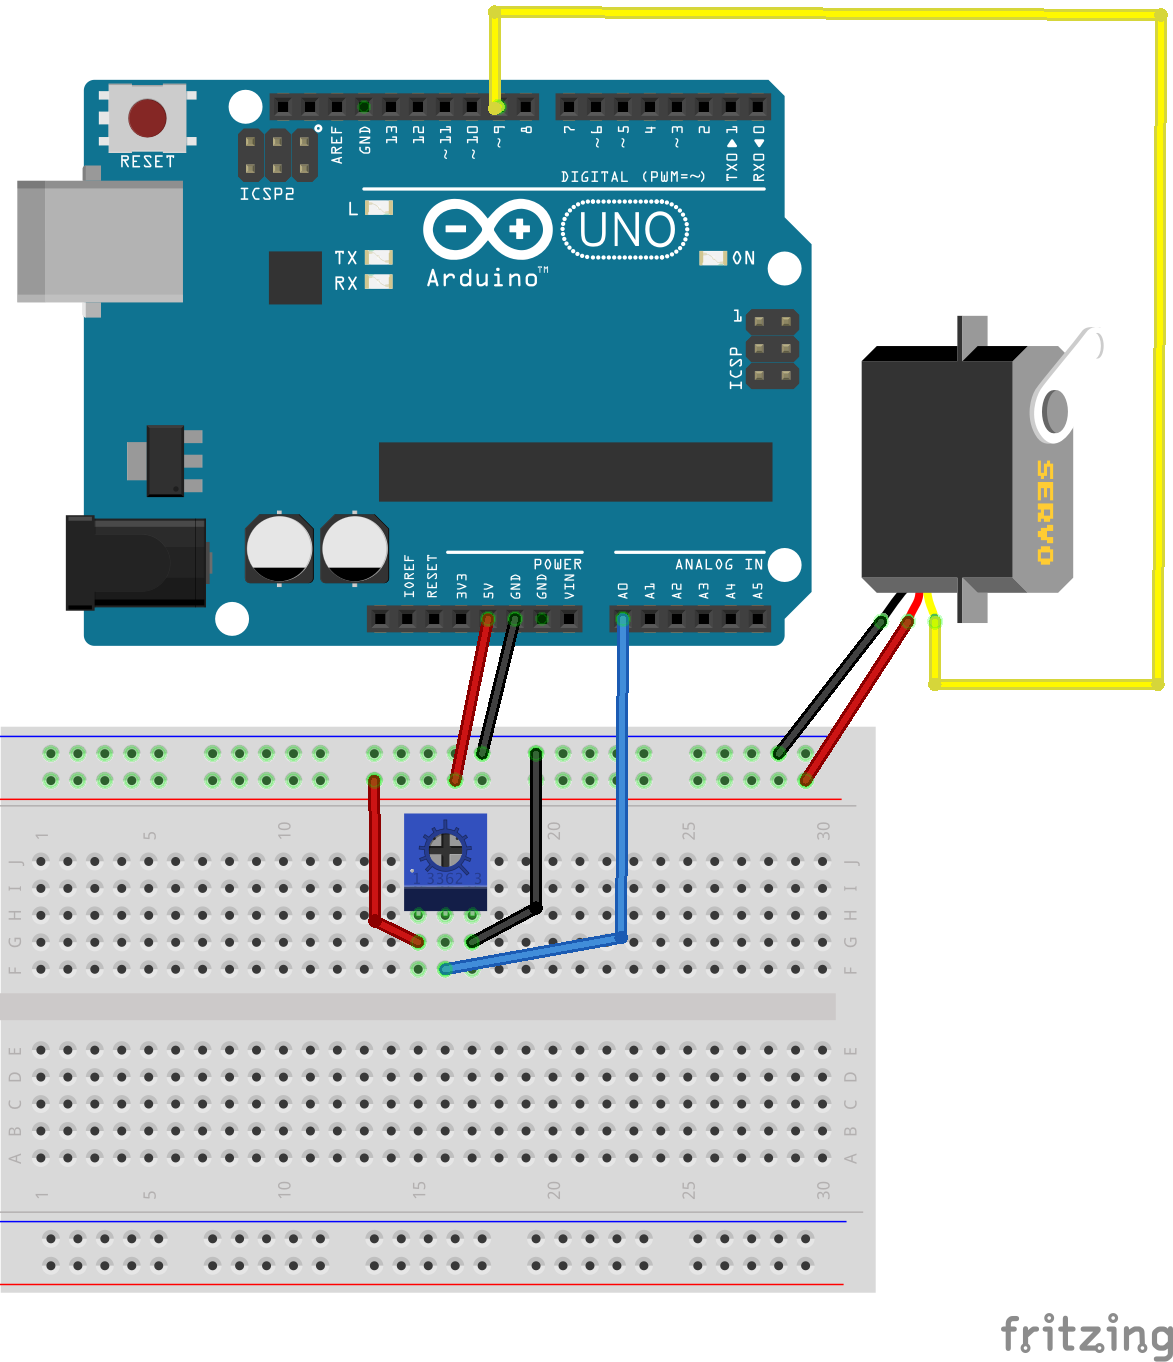
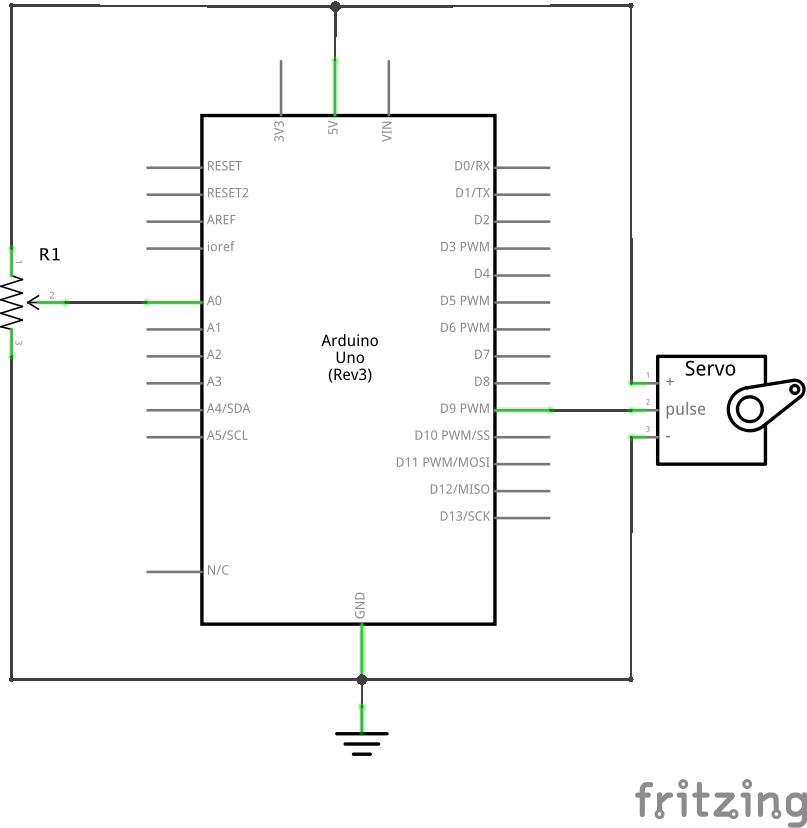
Control the position of a servo using a potentiometer and the built in Arduino example. Also, adjust the example code to work with a new circuit.

The servo knob sketch uses the map(value, fromLow, fromHigh, toLow, toHigh) function that we saw briefly in the sensor-driven-led exercise. This function takes a value within a certain range and maps it onto a different range. For example, the ADC on the Arduino Uno gives a value from 0 to 1023. If I wanted to display that on a 10 segment bar graph LED, I could use the statement: height = map(sensorVal, 0, 1023, 0, 10); to find out how high the bar graph should be.

Steps and observations

  1. Build the initial circuit below
  2. Load the Servo Knob (Examples->Servo->Knob) sketch and upload it to your Arduino
  3. Read throught the code in order to understand how it controls the position of the servo
  4. Swap out the potentiometer in the circuit for another sensor (could be a voltage divider with a photoresistor).
  5. Try using your new circuit. Does it allow you to (somewhat) accurately control the servo's position with a new sensor? If not, try changing the map function to allow for more accurate control (maybe map a slice of the sensor output). Just make sure that the servo is never set to a value less than 0 or greater than 180 (check out the constrain() function in the Arduino reference.

Comments

Other Files

  1. sensor-driven-servo.fzz