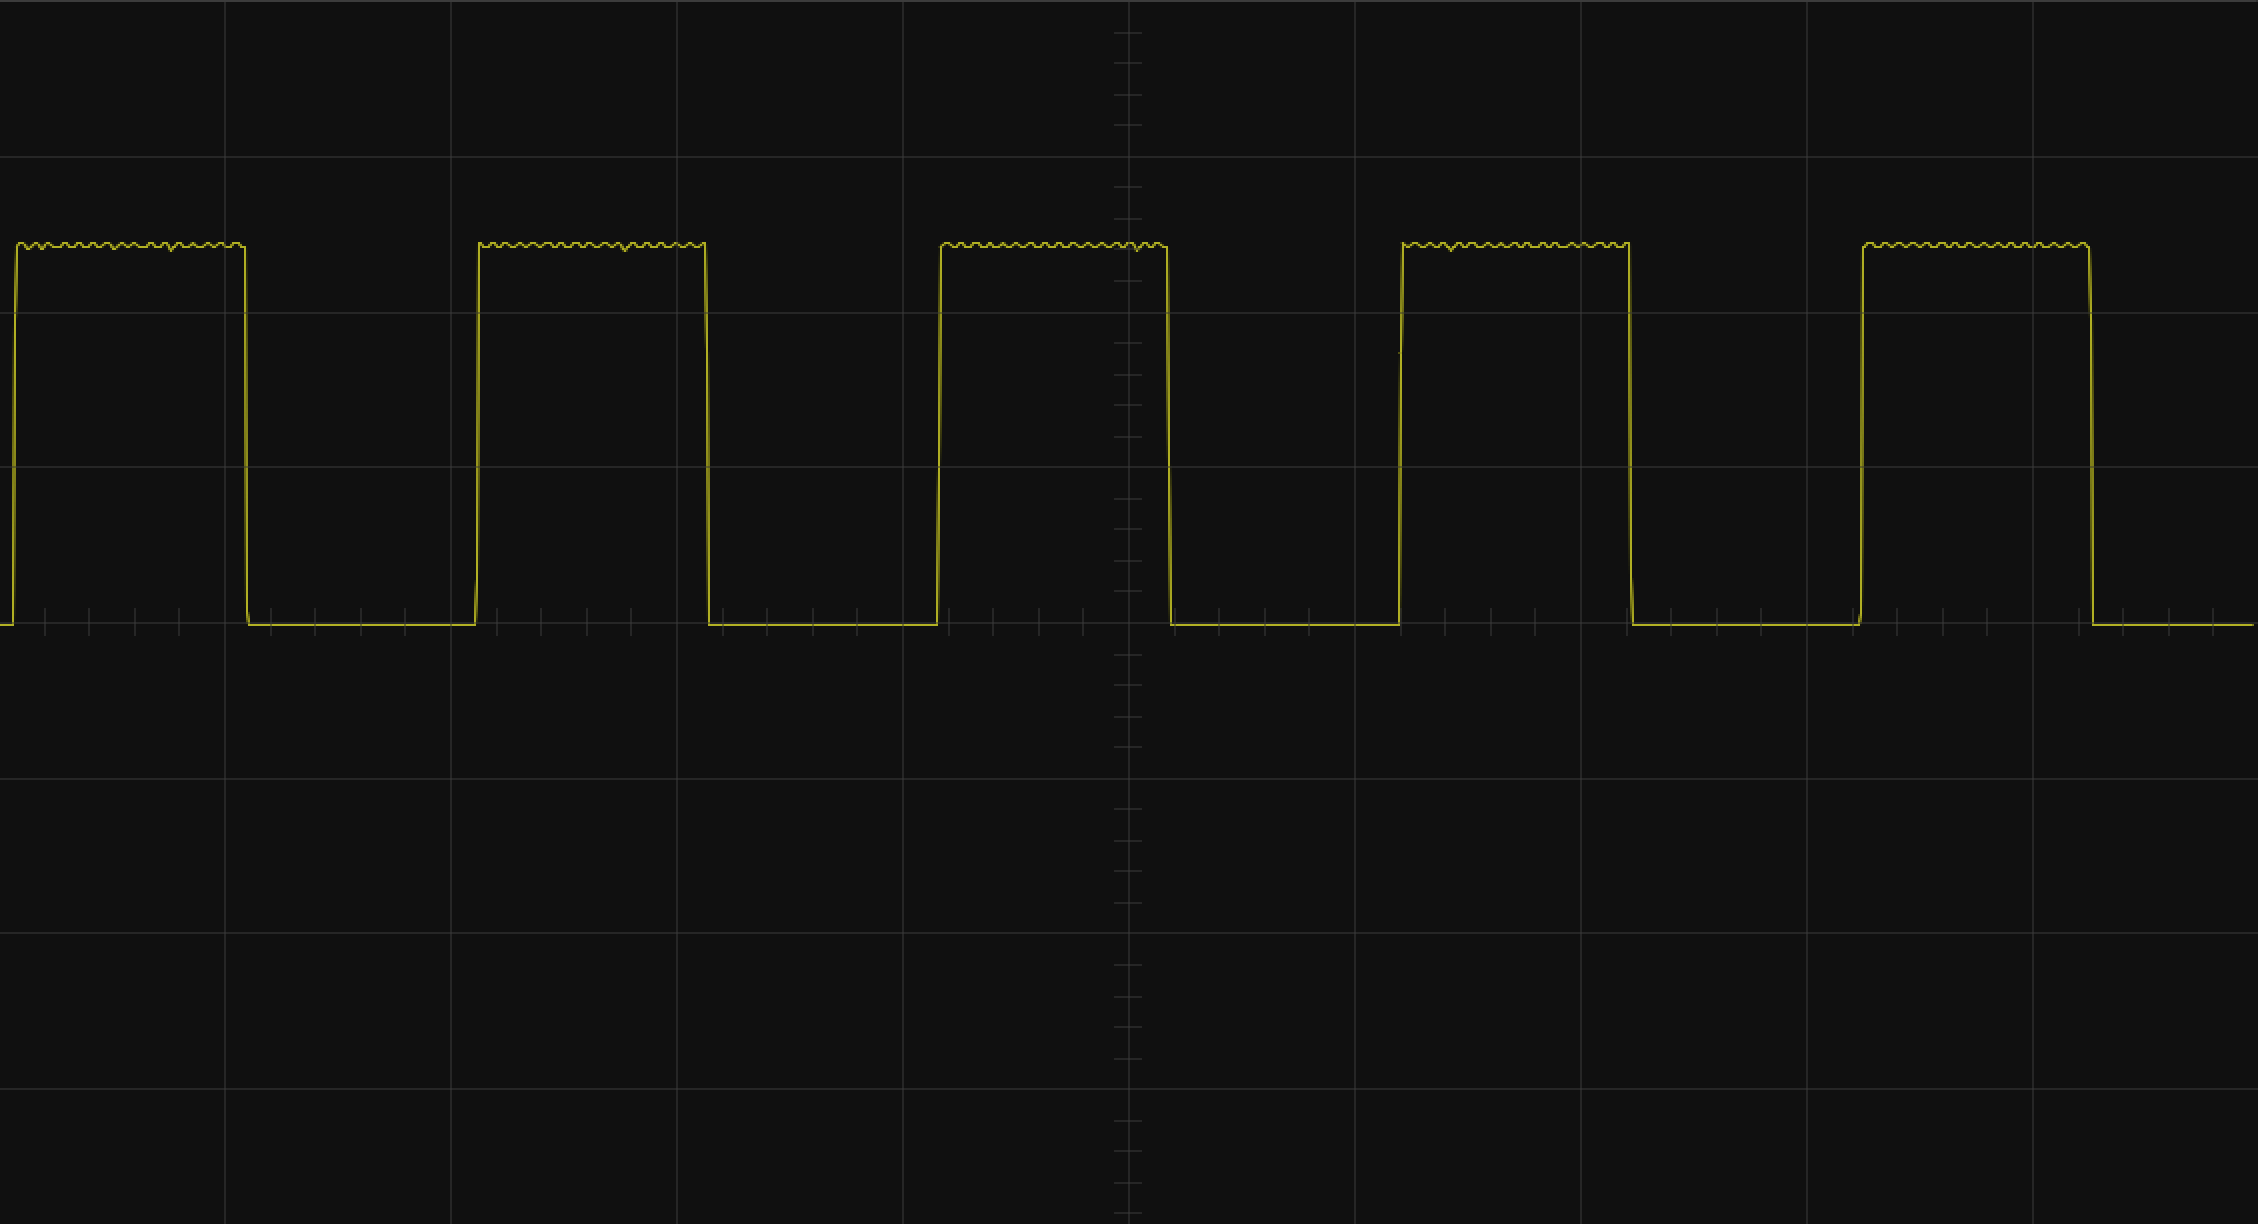
analogWrite(pin, 127)
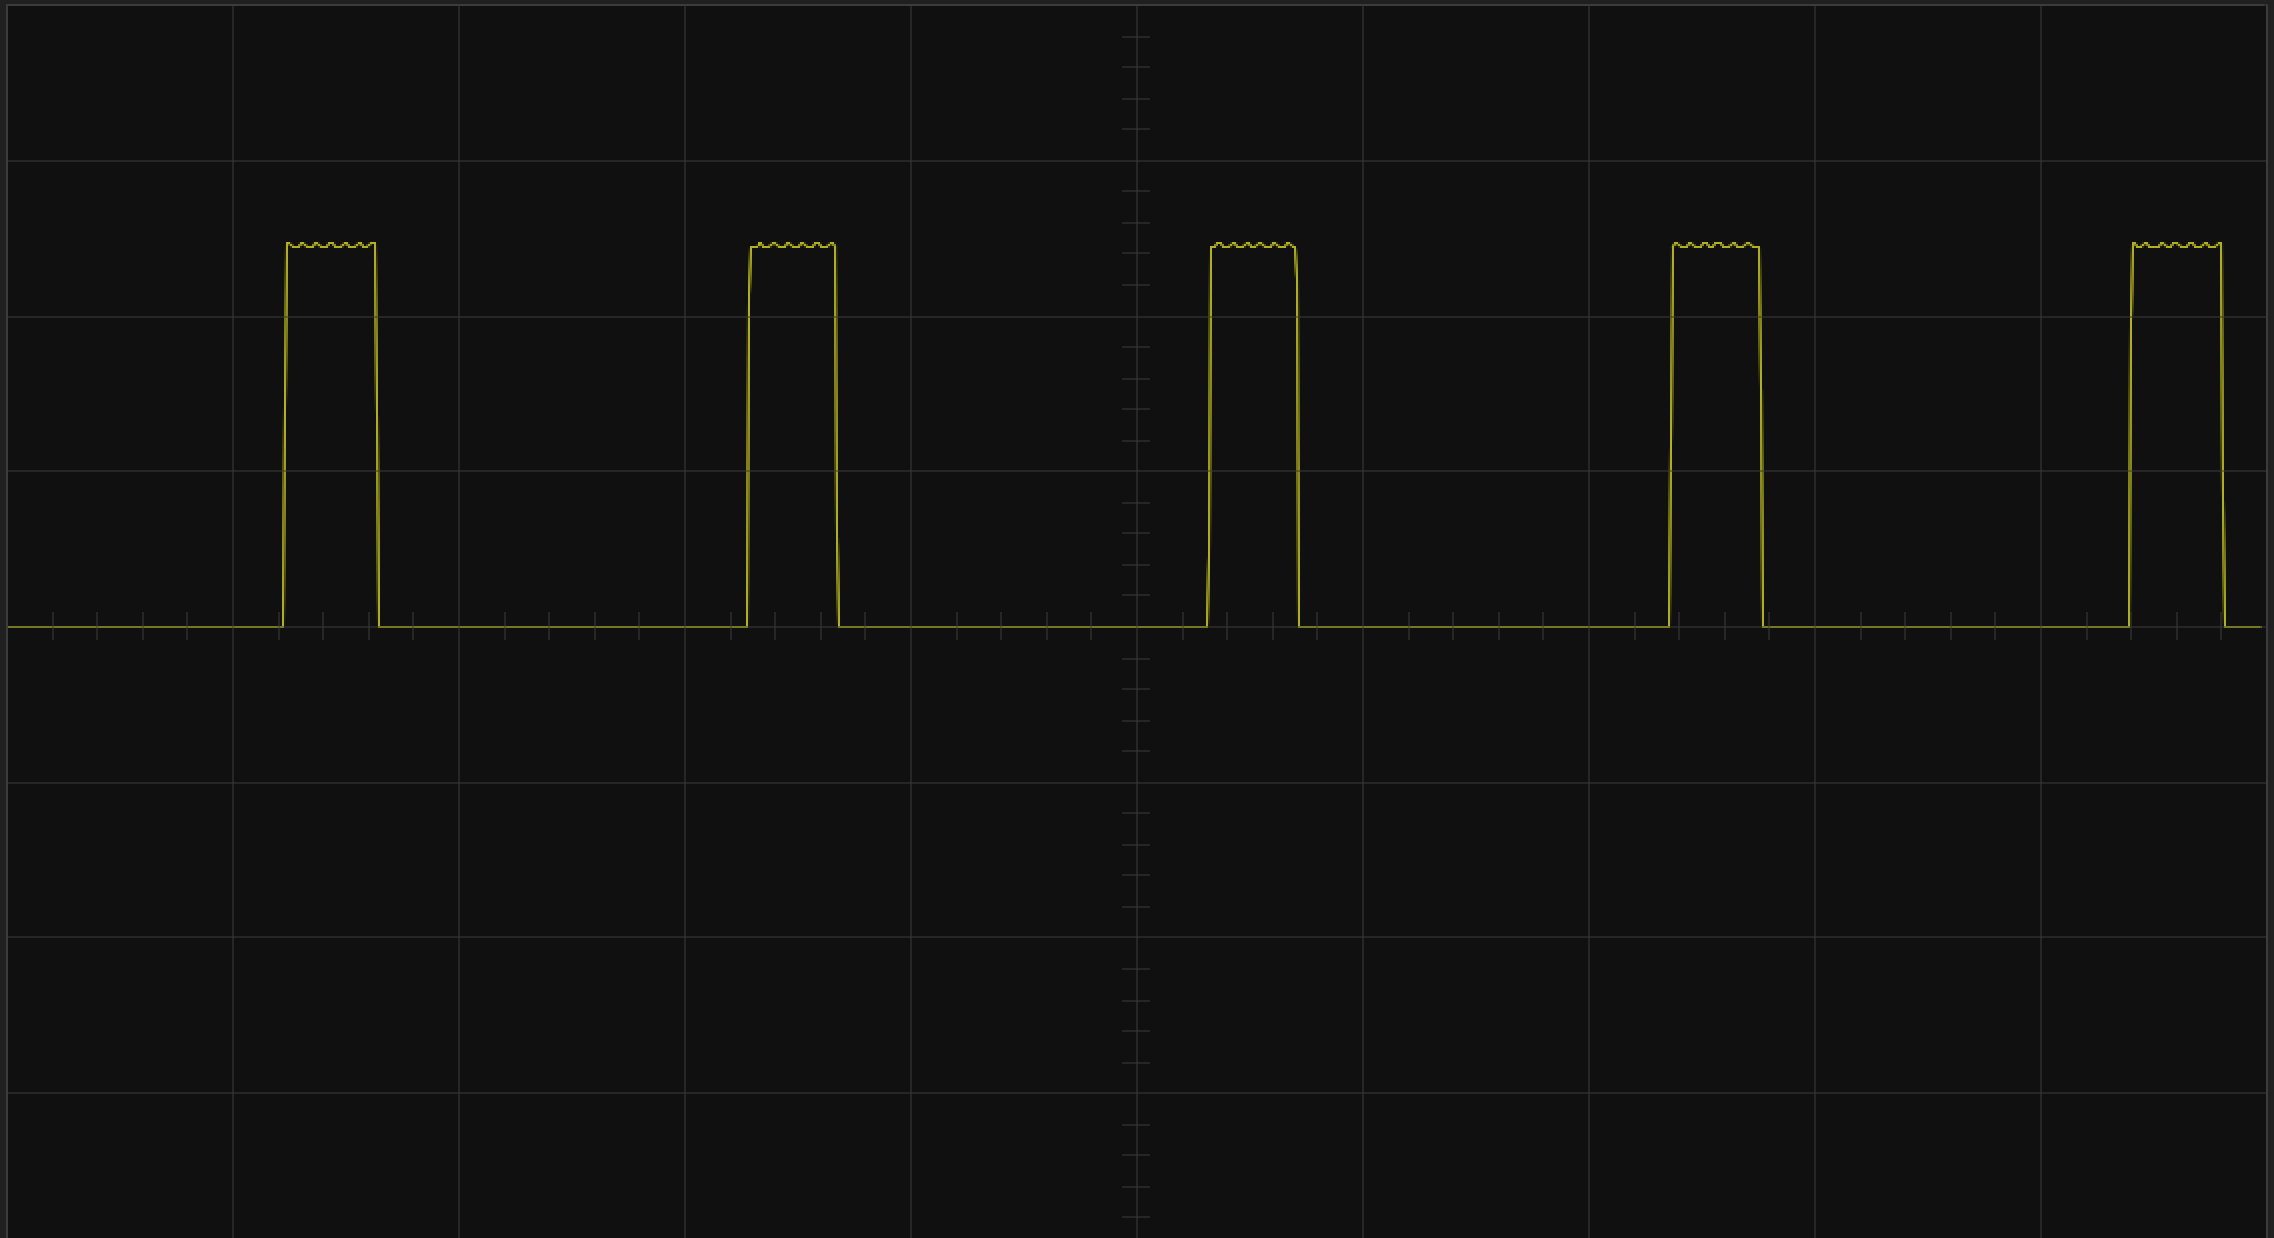
analogWrite(pin, 50)
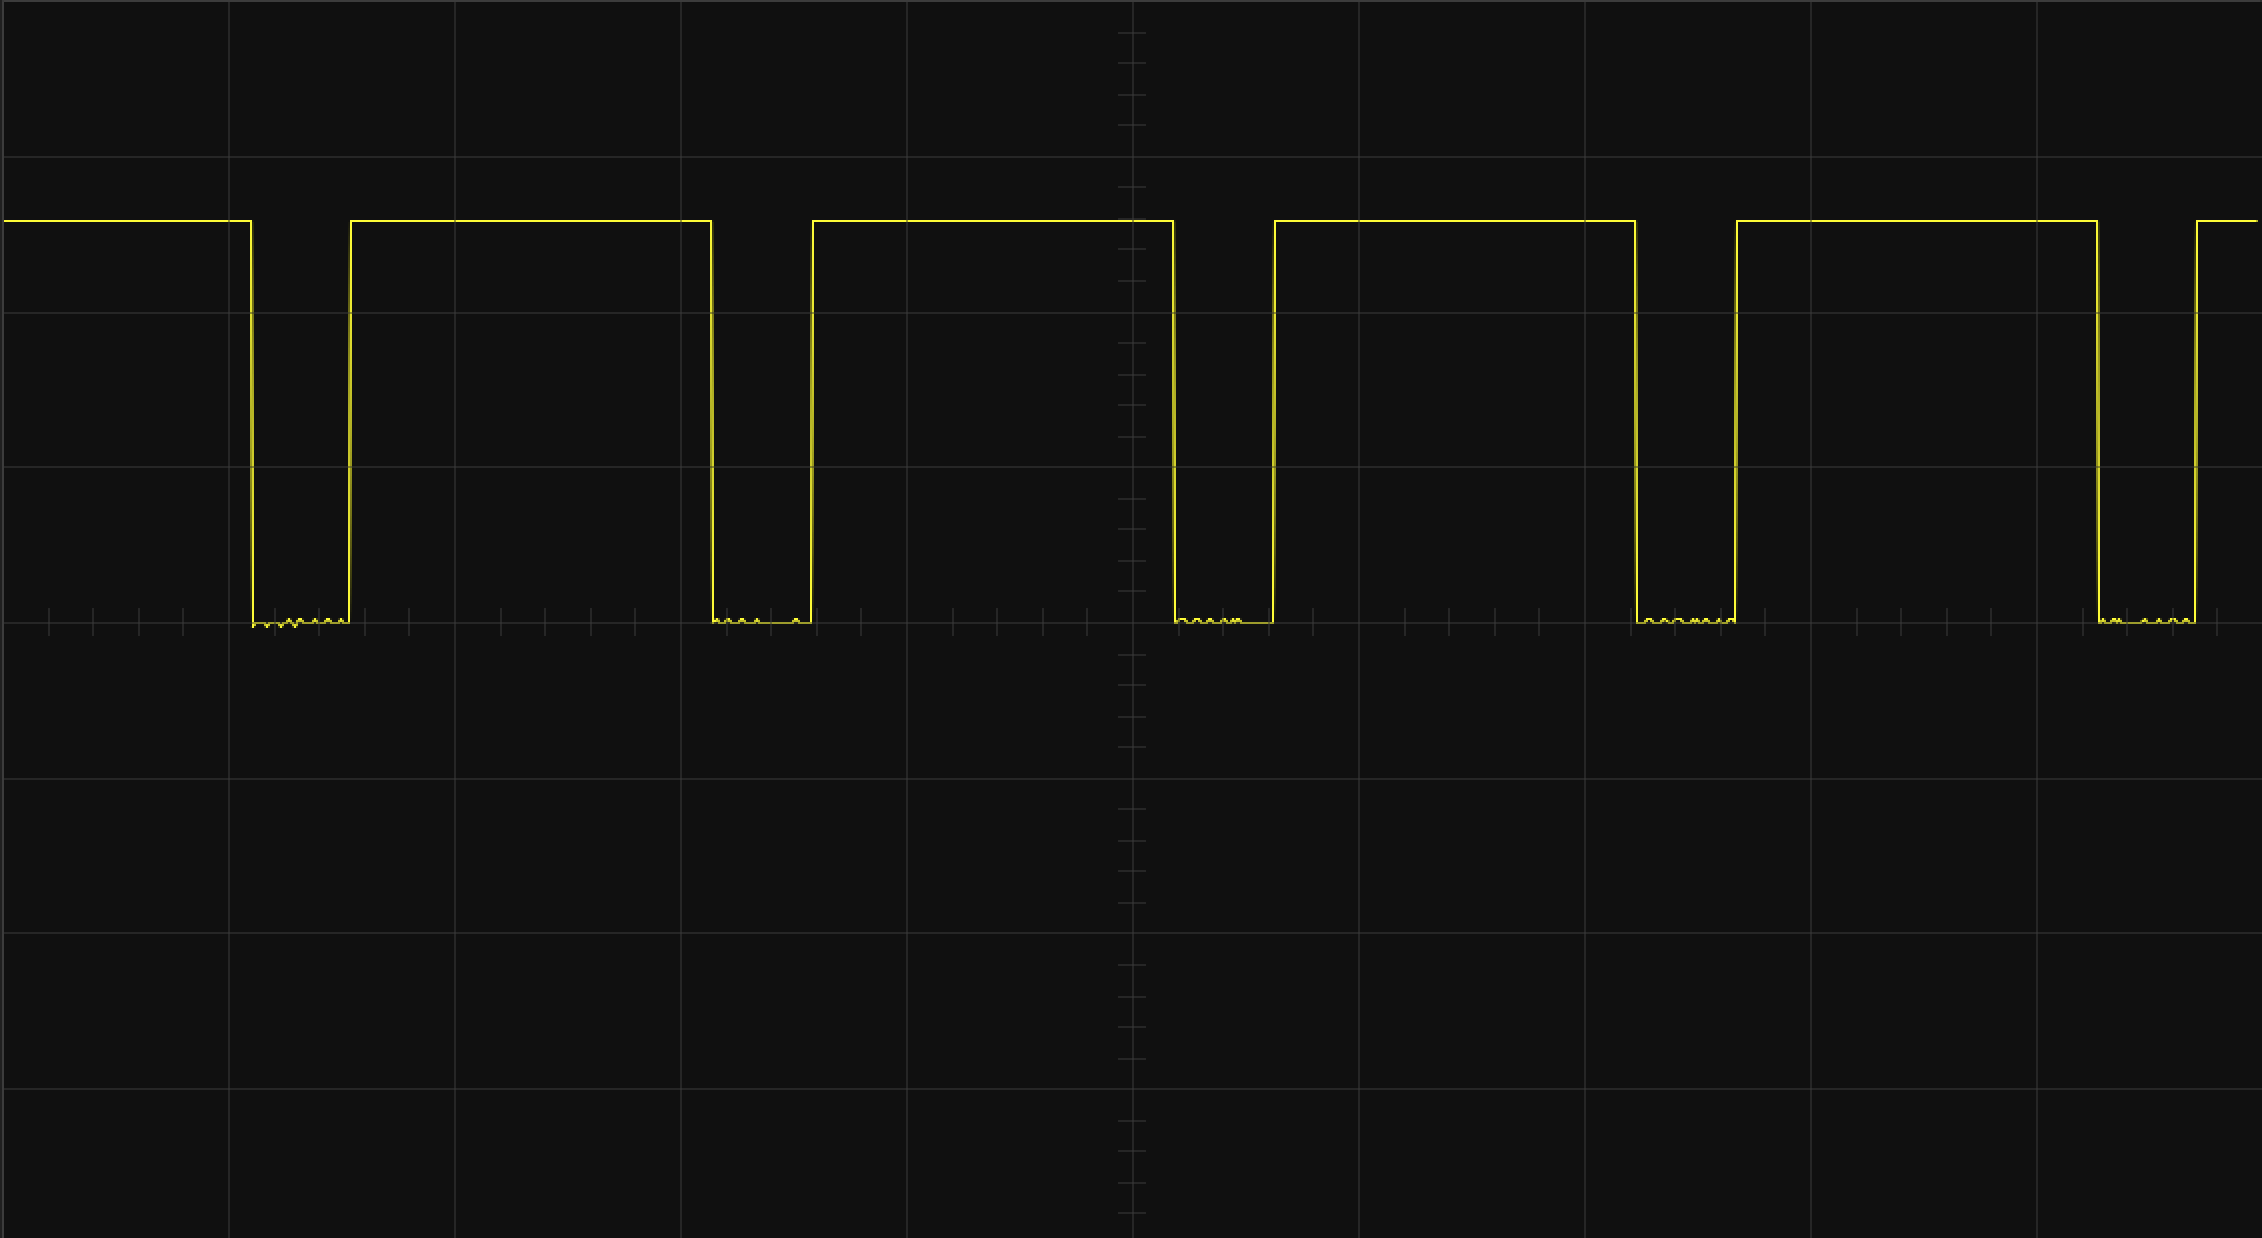
analogWrite(pin, 200)
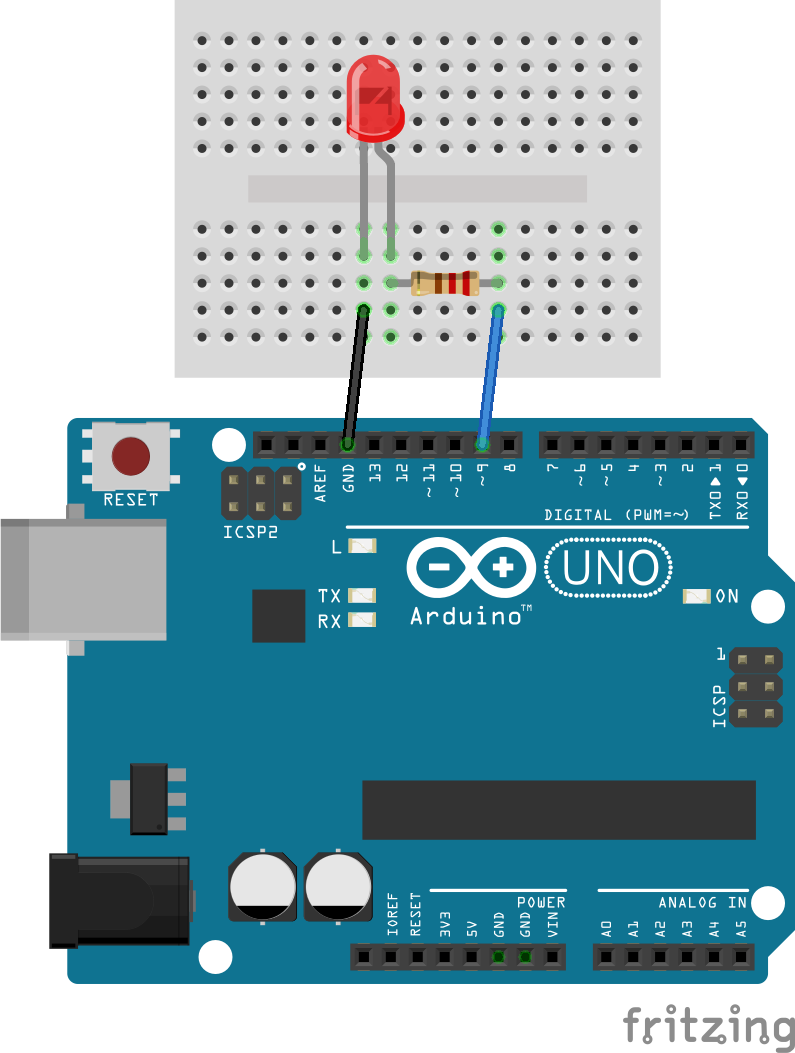
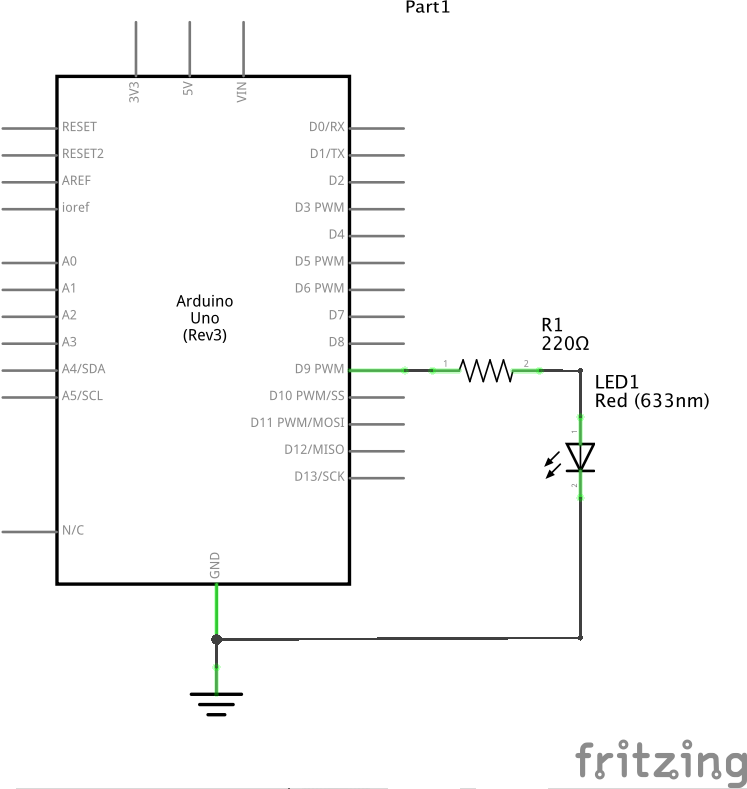
Make an LED fade from dark to full bright and back using the built in Arduino examples.
There are times when one wants to do more than just turn something on
or off using the Arduino: for example, one may one to control the speed of a motor, or the brightness of a light. To do this we use the function: analogWrite(pin, ouptut)
(where 'pin' is the pin number your actuator is connected to, and 'output' is a number from 0=off to 255=on). Executing the commend analogWrite(3, 127), for instance, would turn whatever is connected to pin 3 to %50 on. There is, however, something more subtle happening behind the scene: the Arduino can only ouput 0V or 5V, so there is no
true analog-continuous output built-in on the Arduino.
In order to get around this, the Arduino uses Pulse Width Modulation (PWM).
You can think of PWM as turning the pin on and off really fast while varying the amount of on-time versus the off-time. The larger the on-time-percentage (also called the 'duty-cycle'), the brighter an LED would be or the faster a motor would turn
(check out the comments section for some examples).
Be careful when choosing pins to use with PWM because not all of the Arduino Uno's pins can be used with the analogWrite function. Only the digital pins with the ~ next to the number can be used (3, 5, 6, 9, 10, 11).
Here are some examples of the analogWrite(pin, output) function viewed on an
oscilloscope.
analogWrite(pin, 127)
analogWrite(pin, 50)
analogWrite(pin, 200)